Make the most of your requisitions
Our Requisitions module is designed to streamline communications between assets and shore about purchase requests. This article will highlight some of the features that can help you make the most of your requisitions.
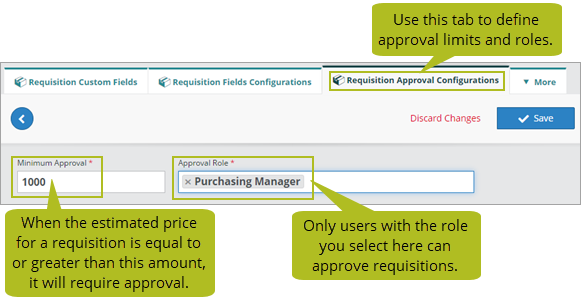
Set up role-based approval limits for requisitions
You can set up an approval limit for your requisitions, which means that you can decide on a minimum cost amount that will require approval, then give a specific role or roles the ability to approve any requisitions that reach an estimated cost equal to or above this amount. If you want all requisitions to require approval, enter a 0 (zero) cost value. If a requisition needs approval, it will appear in your list of requisitions with the status of 'Awaiting Approval'.
To set up and manage your approval gateway and approval roles, use the Setup > Requisitions > Requisition Approval Configurations tab.
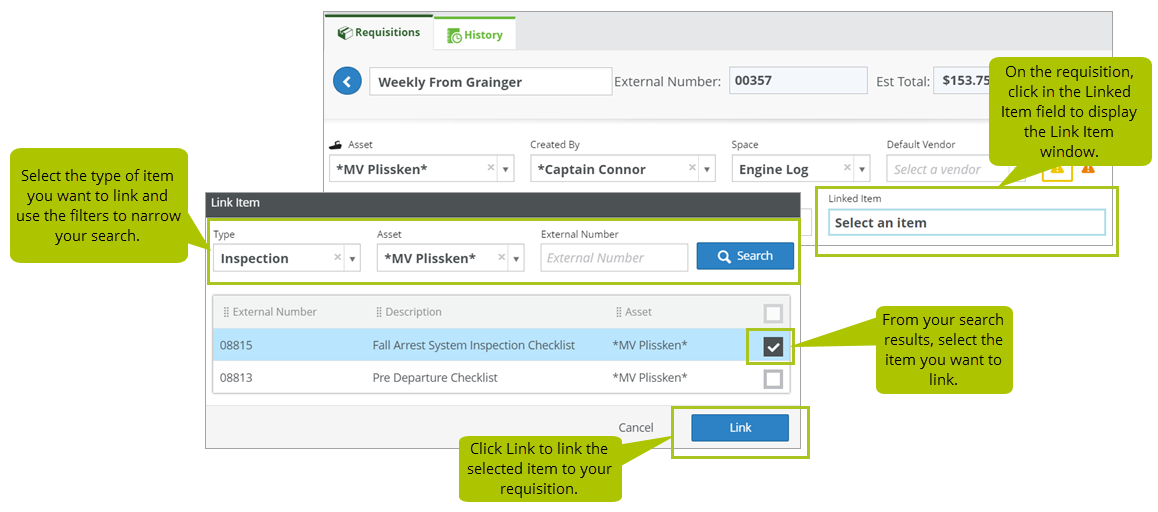
Link requisitions to open items
You can link requisitions to open items, such as tasks and corrective actions, as well as inspections, maintenance routines, inventory counts, and forms. It's easy to search and find the items that you want to link your requisitions to.
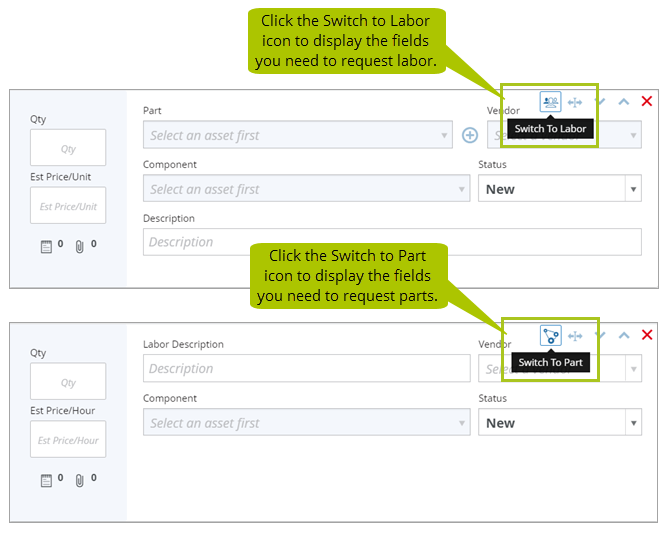
Request labor on a requisition
When you add a line item to one of your requisitions, the Switch to Labor icon above the Vendor field allows you to switch the fields on your line item from parts fields to labor fields. For example, if you switch to the labor fields, you'll see a Labor Description field instead of the Part list, and the estimated price will be displayed in dollars per hour instead of in dollars per unit. To switch back to the parts fields, simply click the Switch to Part icon.
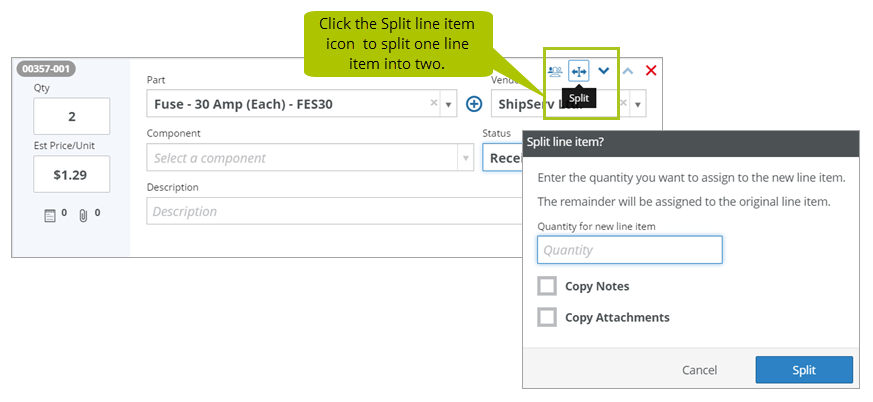
Handle partial shipments
If you only received some of the parts on a requisition, it's easy to handle the partial shipment by splitting a line item into two items, one to record the parts that arrived and one to track the parts that haven't arrived yet. To split a line item, click the Split icon above the Vendor field to display a new window where you can specify how you want to split the line item, as well as copy any notes and attachments from the original line item over to the new line item.
Auto-number each line item
To support integration with external purchasing systems, if you configure Helm CONNECT to auto-number your requisitions, it will apply numbers to each line item as well as to the requisition itself.
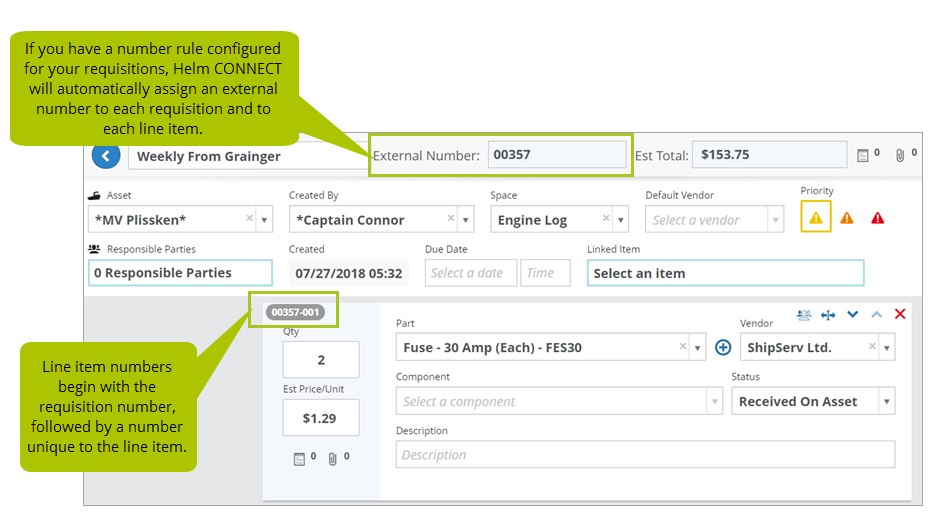
For more about setting up auto-numbers, check out this article.
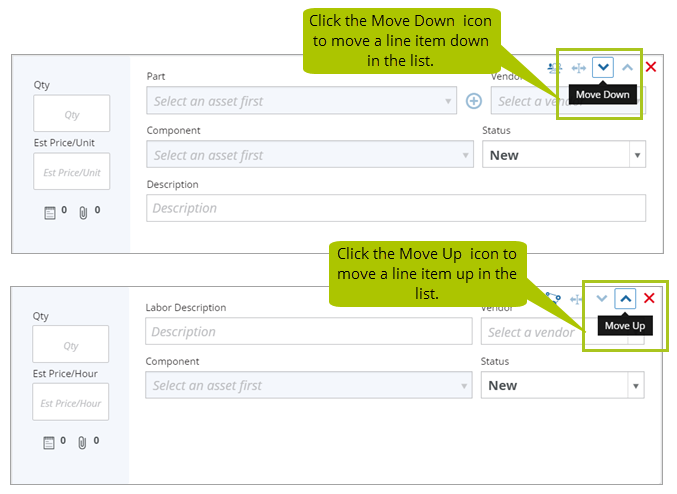
Change the order of line items
You can change the order of the line items in a requisition by clicking the Move Down and Move Up icons above the Vendor field. Group them by price, by type, by vendor, or by whatever order makes the most sense to you.